ArduinoIDE
ArduinoIDE portable
- Download the distribution from the official webpage:
wget https://downloads.arduino.cc/arduino-1.8.13-linux64.tar.xz
tar xvf arduino-1.8.13-linux64.tar.xz
- Inside arduino-1.8.13/, create a directory named portable
cd arduino-1.8.13/
mkdir portable
- By merely existing, this
portabledirectory modiffies the base behaviour of the ArduinoIDE environment. From now on, all the libraries, compilers, utilities, and conffiguration files are always contained within the portable folder.
cd arduino-1.8.13/
./arduino
ArduinoIDE with external Editor
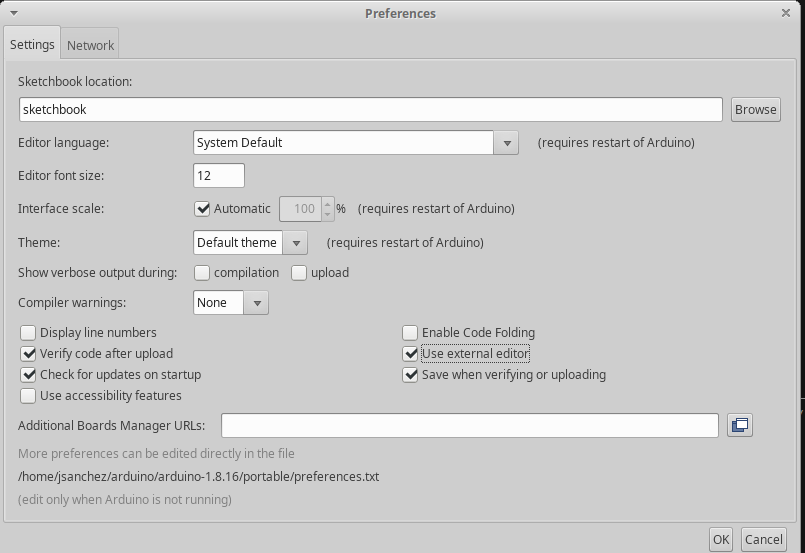
- Go to settings and mark the
Use External Editoroption. - Now you can edit the sketch files with your favourite editor and save.
- When you're done with editing, use ArduinoIDE
Uploadand Serial Console normally.
ArduinoIDE terminal compile and program board
- You can compile and program the board using ArduinoIDE from the terminal:
./arduino
	--port /dev/ttyUSB0
	--board Arrow:samd:SmartEverything_Fox_native
	--preserve-temp-files --pref build.path=/home/jsanchez/tmp/arduinobuild
	--verify || OR || --upload
	./MYSKETCH.ino
--portmust be set to your serial device port.--boardmust be set to your board model (more on this next).--preserve-temp-filestells the compiler to build only the updated files instead of all the code.- This is a HUGE time saver!.
- Must specify with –pref build.path the directory to contain all the temporary object files. This directory can be safely be deleted later.
--verifyonly compiles the code without uploading it to the board (nice for debugging).--uploadcompiles and uploads the code to the board.
Don't forget the ./ in front of your sketch name!!
Finding the board name
./arduino
  --port /dev/ttyUSB0
  --board Arrow:samd:SmartEverything_Fox_native
  --preserve-temp-files --pref build.path=/home/jsanchez/tmp/arduinobuild
  --verify || OR || --upload
  ./MYSKETCH.ino
--boardmust be set to your board model.- You can find several boards.txt files in your source tree.
hardware/arduino/avr/boards.txt
portable/packages/Arrow/hardware/samd/2.1.0/boards.txt
portable/packages/arduino/hardware/samd/1.6.18/boards.txt
You can build the board following the dir names and within the boards.txt file itself:
SmartEverything_Fox_native.name=SmartEverything Fox (Native USB Port)
ArduinoIDE modular code
- Besides your
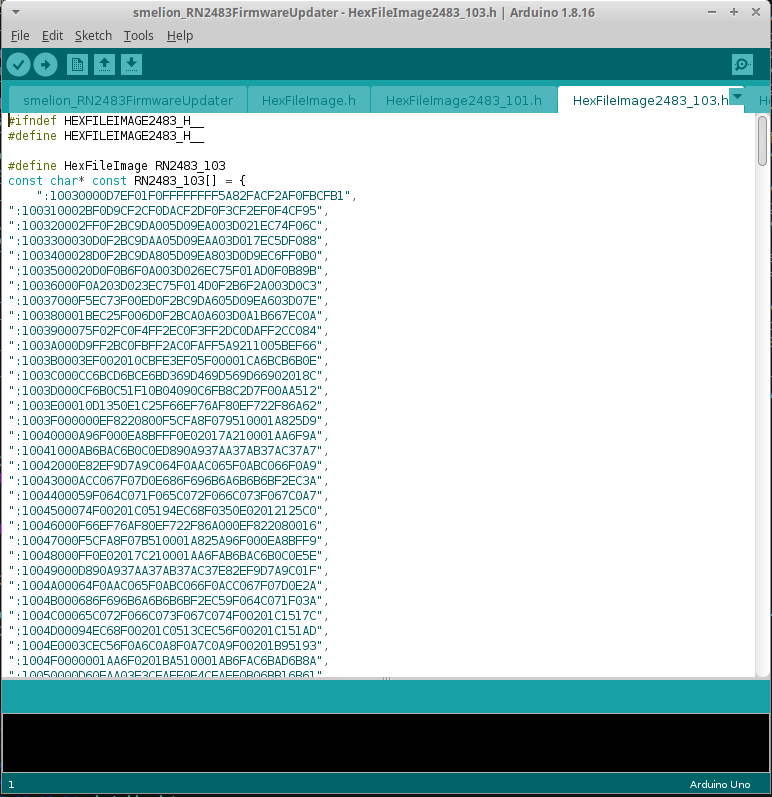
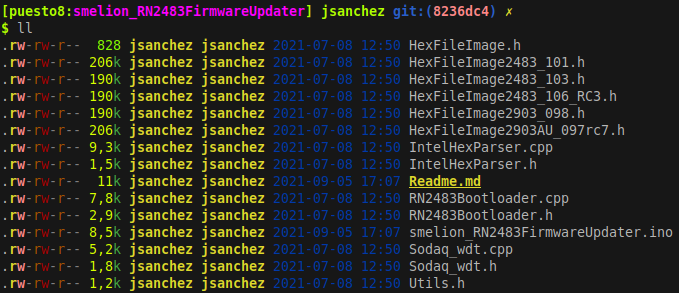
.inofile, you can place additional source files within your sketch folder. - These will be compiled and linked implicitly by the ArduinoIDE toolchain.
- However, don't forget to do apply the correct C/C++ modular code practices!! i.e.
#include,extern, etc. - Note how the files are listed as TABS in the ArduinoIDE interface.
ArduinoIDE Debug PRINT
- Print function calls can be controlled across a whole
.cfile without rewriting code. - This enables us to switch the debug PRINT on/off with a simple macro definition
#define DEBUG. - This is implemented in some way or another in difierent projects. It is a very widespread practice.
- Copy this block in your C file.
#ifdef DEBUG

  #define PRINT(...) Serial.print(__VA_ARGS__)
  #define PRINTLN(...) Serial.println(__VA_ARGS__)
  #define PRINT_ARRAY(add, len) \
  do { \
    int i; \
    for (i = 0 ; i < (len) ; i++) { \
      Serial.print((unsigned int)((uint8_t*)(add))[i], HEX); \
    } \
    Serial.println(); \
  } while(0)

#else /* DEBUG */

  #define PRINT(...)
  #define PRINTLN(...)
  #define PRINT_ARRAY(add, len)

#endif /* DEBUG */
- Then, write conditional print sentences as
PRINT(var). - Additionally, the
PRINT ARRAY(address, len)function simply prints in HEX an array passed as an argument. - NOTE to activate the conditional debut pring,
#define DEBUGmust be writen before the previous code block.- Alternatively, it can be defined with a compiler CFLAG environment variable.
Use example:
uint8_t foo[255];
int bar = 7;
...
PRINTLN(bar);
PRINT_ARRAY(foo, sizeof(foo))
// These prints only if the DEBUG macro was defined.
7
EE FF 01 25 ...
ArduinoIDE alternative serial consoles
- ArduinoIDE comes with an embedded serial console.
- Alternatively you can use a serial console like picocom, but you must set it to the right parameters.
picocom

  -g "logs/serial_console_log.txt" # Save the consolo text in a log file
  -r                               # NO-reset - avoid reseting the device
  -b 115200                        # Baudrate - MUST MATCH ARDUINOIDE!
  --omap crcrlf                    # Mapping of EOL characters
  /dev/ttyACM0
- Exit Picocom with
Ctrl+A,Ctrl+X.
Meter código C en Arduino
Se pueden meter archivos .c y sus respectivos .h en el mismo directorio que el sketch:
Fuente: https://forum.arduino.cc/index.php?topic=45003.0
C++, which the Arduino is programmed in, performs name-mangling. C, which your external functions are written in, does not.
Name-mangling means that the actual function that gets called is called using a name that is composed of the class name, function name, and argument type names.
In order to call a C function from a C++ function, the compiler needs to know that it should use C calling syntax, not C++ calling syntax.
In the header file, before any function declarations, add:
#ifdef __cplusplus
extern "C" {
#endif
After all function declarations, add:
#ifdef __cplusplus
}
#endif
This will allow the C functions to be called from C++.
IMPORTANT Make sure that the files that you are compiling appear in the ArduinoIDE as tabs. If not, the compiler does not recognize them. Always rename your .c files to .cpp.
Code Footprint
Reducir el tamaño de los firmwares
Por defecto, arduino le pasa al compilador el Flag -g, este flat añade a los archivos .o varios campos de depuración,
que son listados en el .map como .debug_info, .debug_range, etc. Este código incrementa considerablemente el
tamaño del firmware.
Para eliminar el código de depuración de los archivos objeto, editar el archivo platform.txt y quitar la opción
-g de todos los flags de compilación.
- Los flags de compilación se encuentran en el archivo
platform.txt, son líneas con el nombrecompiler.E.g.:
arduino-1.8.0/portable/packages/Arrow/hardware/samd/2.1.0/platform.txt
Luego compilar los firmwares respectivos, abrir el directorio de compilación y utilizar el script:
python3 ~/bin/analyze_map.py coap_eap_integration.ino.map
Los archivos que pertenecen a cada una de las partes del código están listados en el readme de cada firmware.
Ejemplo de lo que estamos hablando:
Coap


/tmp/arduino_build_288104/sketch/coap_eap_integration.ino.cpp.o 	   1916  (code : 1724 data : 192)


/tmp/arduino_build_288104/sketch/eap-peer.cpp.o 	    611  (code                : 432  data : 179)
/tmp/arduino_build_288104/sketch/eax.cpp.o 	    787  (code                      : 608  data : 179)
/tmp/arduino_build_288104/sketch/eap-psk.cpp.o 	   1207  (code                   : 995  data : 212)
/tmp/arduino_build_288104/sketch/aes.cpp.o 	   1719  (code                      : 1541 data : 178)
/tmp/arduino_build_288104/sketch/cantcoap.cpp.o 	   4592  (code                : 4413 data : 179)
TOTAL                                                                            : 7989      : 927 : 8916

/tmp/arduino_build_288104/sketch/at_client.cpp.o 	    828  (code                : 649  data : 179)
/tmp/arduino_build_288104/sketch/bg96.cpp.o 	   1740  (code                      : 1561 data : 179)
TOTAL                                                                            : 2213      : 358 : 2571

### PANA


/tmp/arduino_build_319025/sketch/panatiki_integration.ino.cpp.o 	   1392  (code : 1188 data : 204)


/tmp/arduino_build_319025/sketch/eap-peer.cpp.o 	    632  (code                : 449  data : 183)
/tmp/arduino_build_319025/sketch/eax.c.o 	    787  (code                         : 608  data : 179)
/tmp/arduino_build_319025/sketch/eap-psk.cpp.o 	   1203  (code                   : 975  data : 228)
/tmp/arduino_build_319025/sketch/aes.c.o 	   1719  (code                         : 1541 data : 178)
/tmp/arduino_build_319025/sketch/state-machine.cpp.o 	   3245  (code             : 3066 data : 179)
TOTAL                                                                            : 6639      : 947 : 7586

/tmp/arduino_build_319025/sketch/at_client.cpp.o 	    828  (code                : 649  data : 179)
/tmp/arduino_build_319025/sketch/bg96.cpp.o 	   1743  (code                      : 1564 data : 179)
TOTAL                                                                            : 2213      : 358 : 2571


